Mortal Shell 2Gloom Farming: The High Lord's Keep Crossbow Loop
A mid-game gloom farm that pays roughly 550,000 to 650,000 an hour and asks almost nothing of your reflexes. You stand at one fixed spot in the High Lord's Keep, turn around, and lob a single Solnir Shard round over a wall into a packed group of enemies. Emberseed Stone sets the whole pile on fire and the burn finishes them. Each volley returns 1,217 gloom plus a steady stream of coin drops, and you never have to fight anything. The setup is the real cost: it needs the Forgotten Crossbow and two specific Tarstones at level 3, which is several hours of collecting if you are starting from nothing. Once it is running, the loop is a single button press repeated until you hit the level you want.
Before you start
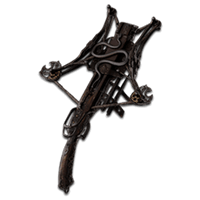
- The Forgotten Crossbow sidearm, found in the Flooded Village dungeon in Sunken Village
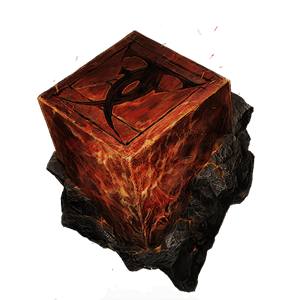
- The Emberseed Stone Tarstone at level 3, so the burn infusion lasts 8 shots instead of firing only on critical hits
- The Solnir Shard Tarstone at level 3, which raises the splash damage on the arcing round to 120
- The Etching Needle, handed to Franz to unlock the Tarforge upgrade options at Marrow Keep. Without it you cannot take either Tarstone past its starting level. It is in a bone chest just before the Magdalena, the Lady of the Woods fight
- A crossbow at +9 or better. The creator runs +9 and it is enough to catch the large enemy in the group. Higher is strictly better
- Mid-game progress. You need Outskirts of Mammon unlocked as a fast travel point from the top of Marrow Keep
Items / Buffs

Before You Start: The Three Requirements
Pick up the Forgotten Crossbow in the Flooded Village
The whole farm runs off this one sidearm, so collect it first. Start from Widow's Overlook and travel to the Blackridge Pass Beacon. Head south toward the very long wooden bridge, cross it, then take the second bridge and clear the handful of enemies waiting on the far side. You are looking for a doorway sealed behind wooden planks. Break the planks, walk through from that side, and the opening on the far end unlocks the flight gate. The crossbow sits inside a chapel in the Flooded Village dungeon, guarded by two Tempestresses. It uses Resolve as ammo rather than a separate bolt count, which is what makes the loop repeatable without a resupply run.
Loot the Emberseed Stone from the Mushroom Village Beacon
This is the easiest of the three to collect. Go to the Mushroom Village Beacon in Fainweald and clear it as normal. The Beacon leads into the Passenger's Shrine dungeon, and near the end of the run there is a chest in a long hallway holding the Emberseed Stone. This is the piece that turns a single arcing round into a wipe. It infuses your sidearm with Burn, and the fire spreads through the packed group long after the round itself lands.
Beat the Gloombound Wraith for the Solnir Shard
The longest of the three collection trips. Start from the Outskirts of Mammon and make your way to Castigator's Keep. There is a boss in your path there that has to go down before you can continue. Push straight through to the Vestige of Infinity and cleanse the Gate of Infinity. It will show as corrupted until you do. Cleansing it opens the Forbidden Archives dungeon inside, where the Gloombound Wraith guards the Solnir Shard. Budget real time for this one. The creator has a separate 15 minute video covering just this fight and the approach to it.
Take both Tarstones to level 3 at Marrow Keep
Level 3 is not optional. At level 1 the Emberseed Stone only applies Burn on critical hits, which is nowhere near enough to light the group, and the Solnir Shard's round barely dents anything. At level 3 the burn infusion lasts 8 shots and the arcing round deals 120 splash damage, which is the exact point the farm starts returning 1,217 a volley. Tarstones gain experience from kills while equipped, so equip both and play normally. Once the experience bar fills, go to Franz at the Tarforge in Marrow Keep and pay the coin cost to upgrade. Note that Franz cannot upgrade anything until you have given him the Etching Needle, which the video does not mention. It is looted from a bone chest just before the Magdalena, the Lady of the Woods fight. Convenient detail: farming this spot levels the stones themselves, so your first session here will push them the rest of the way.
Get the crossbow to +9
The creator runs the Forgotten Crossbow at +9 and points out that an earlier attempt at a lower level did not work as well. Below that, the round does not reliably kill the large enemy in the group and the fire burns out faster, which drops your per volley return well under 1,217. If you are above +9 you are in better shape than the video. If you are below it, upgrade before making the trip. This is the one requirement where you can feel the difference immediately.
Reaching the Farm Spot
Fast travel to the Outskirts of Mammon
The Outskirts of Mammon is reachable from the start. It was blocked during the beta, and a lot of older guides still repeat that, but at launch you can go straight there. Head to the top of the building at Marrow Keep and teleport across. Be aware that this region hits harder than the areas around it, so arrive at a reasonable level rather than rushing it on a fresh character. Once you land, the tall structure is behind you, which is the orientation everything below assumes.
Head right and climb, watching for bear traps
With the tall structure at your back, go right. The path ahead is seeded with bear traps, so keep an eye on the ground rather than the enemies. If this is your first visit you can grab the area map here, which is worth the few seconds. Follow the path around and jump up onto the ledge to keep climbing toward the Keep.
Go invisible and run past the two heaviesOptional
Two enemies sit on this stretch that are not worth your time. The first wants a Great Star to bring down properly. Rather than fight either, turn invisible and keep moving. The second one can still roughly sense where you are, but it is far too slow to catch you if you do not stop. There is a trial or beacon partway up as well. Ignore it and run past the group around it. Nothing on this route needs to die.
Enter from the side, since the gate is shut
When you arrive you will see the gate with your farming targets behind it, and it will be closed. Do not try to open it. Instead take the path around the side, go up, and then turn around. One more large enemy waits along this stretch and will try to block you. Keep running. Coming around this way puts you out on the ledge above the group, which is the firing position everything else depends on.
Running the Farm
Stand at the spot and turn your back to the group
This is the part that looks wrong the first time. Take up the position above the enemies, then turn around so you are not even facing them. The Solnir Shard's round travels on an arc, so it clears the wall between you and the group without a line of sight. You do not need to see anything you are shooting. Watch the right side of the screen for the prompt rather than the enemies themselves.
Aim high toward the middle of the pack and fire
Point roughly at the middle of where the group sits, then raise your aim noticeably above that. The reason is mechanical, not a quirk: the Solnir Shard launches a heavy round in a parabolic arc, so you are firing a mortar, not a bolt. Aiming flat drops the round short. Aiming high lands it in the middle of the pile. Each round costs 25 Resolve, bursts for 120 splash damage at level 3, and the Emberseed infusion sets everything caught in it on fire. A clean volley returns 1,217 gloom.
Expect the first volley to fall short
Your opening shot will often come back with less than 1,217 because it missed the large enemy at the back of the group. This is normal and it is an aiming correction, not a bad spot. Raise your aim a little further and fire again. Sometimes it takes until the second or third round to find the line. Once you have it, every volley from then on returns the full amount, and you can fire it blind without re-checking.
Let the burn do the rest
After the round bursts, the Emberseed infusion lights up the whole group and the fire keeps working for several seconds. At crossbow +9 with both stones at level 3, the burn hangs around noticeably longer and reaches the large enemy that shrugs it off at lower levels. Do not rush the next shot while the fire is still spreading. This is also why level 3 on the Emberseed Stone matters so much: the 8 shot infusion window means you are not re-infusing between every volley.
Repeat until you hit the level you want
That is the entire loop. Turn, aim high, fire, wait for the burn, repeat. Nothing chases you to the ledge and nothing about the position degrades, so you can run this for as long as you have patience for. The creator describes it as flimsy at first and faster with practice, which matches. Your rate is limited only by how quickly you can reset and fire, not by anything the game does to stop you.
What You Walk Away With
Roughly 550,000 to 650,000 gloom an hour
At 1,217 gloom a volley, the hourly rate comes down entirely to how fast you can cycle. The creator puts a comfortable pace at 7 to 10 volleys a minute. Ten a minute works out to about 650,000 gloom an hour, and seven a minute still lands around 560,000. Call it 550,000 to 650,000 depending on how smooth you are. This is a skill you get better at within the first few minutes, so treat the lower number as your floor rather than your average.
Sweep the coin drops, which are the hidden half of the payout
Gloom is the headline, but these enemies also drop coin in quantities that are out of proportion to everything else in the game. After roughly 15 to 20 minutes of firing, the creator collects the pile and ends up over 32,000 coin in a single sweep, which is more than had been held at one time in the whole run to that point. Since Tarstone upgrades at Franz cost coin per level, the farm quietly funds its own requirements. Clear the one enemy that wanders into the collection area first so it does not interrupt the sweep.
Turn on auto collect before you start
Do this first and save yourself the trouble. There is an auto collect money option buried in the settings menu, which the creator only remembers partway through picking up several hundred individual drops by hand. With it on, the coin gathers itself as you walk through the area and the only button you press all session is the one that fires the crossbow.