Undying Stray Genessa
 Genessa
Every other shell in Mortal Shell 2 treats an empty health bar as the end of the run. Genessa treats it as a form change. Duality drops her into Stray instead of knocking her out, and Stray is where this build actually lives, because Stray Doubles copy every melee swing and every shot you take. Mirage is the piece that makes it obscene. Your doubles throw themselves in front of a fatal blow and floor whoever landed it, twice over at max level, so the creator's claim that healing is optional is close to literal. Sitting at low health is not a mistake to recover from here. It is the state Berserker's Stone and Spite Stone both pay you for.
Damage
Stray Doubles at 200% melee and ranged damage, 35% infusion copy chance, 18% crit into +100% crit damage
Survivability
Two cancelled fatal blows per double set, each with a knockdown. Healing is close to optional
Boss
Naylshotte flurry chains Bloodcurse detonations. Melts elites and bosses

Genessa
Genessa the Wayward is the summoner shell. Her ability calls up copies of herself that fight alongside her, and her passive, Duality, means running out of health does not sever her from the Harbinger like every other shell. She turns Stray instead, and her Stray copies mirror whatever she does with her weapon and her sidearm.
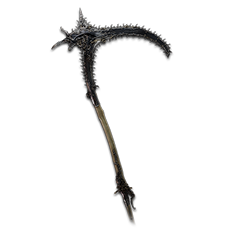
A chainsaw scythe with a dismemberment effect that tears enemies apart rather than just killing them. The creator admits he was sceptical of it and came around completely. Its light attack is a full 360 spin, which is exactly what you want when your doubles are copying every swing into a crowd, and the running light attack is a slash into an overhead slam that does heavy damage and refunds a large slice of the Resolve bar. It is also the weapon that accepts Scholar's Wormstone.
How to Obtain
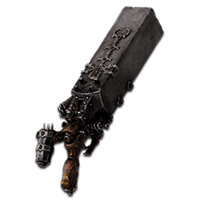
The sidearm, and a much larger share of the build's damage than its starting-weapon status suggests. On its own it is a short range explosive blast. Loaded with the three stone package it becomes the tool that deletes elites and bosses, firing a flurry of exploding shots that each carry Bloodcurse and chain detonations in quick succession. Causality means your Stray Doubles are firing it too.
How to Obtain
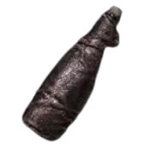
Equipped in the Active slot. Every item in Mortal Shell 2 carries two separate effect tracks and which one you get depends on whether you slot it as Active or Passive. Active Common Moonshine is a Resolve drink worth 50 at full Familiarity, and Resolve is what this build actually runs on, since it pays for summoning doubles, for the Wormstone chainsaw and for the sidearm ability.
How to Obtain


Combat Strategy
- ▸Put the first point into Alteration before anything else. Until you are Stray by default the doubles only swing once and vanish, and the entire build is built on them copying you instead.
- ▸Take Mirage to three after that. The second point is the one that gets a second Stray Double out, and the third turns each of them into a cancelled fatal blow.
- ▸Slot Common Moonshine as your Active item. At full Familiarity it hands back 50 Resolve, which is what pays for resummoning doubles and for the Wormstone chainsaw.
- ▸Drop yourself deliberately low before a boss. Berserker's Stone and Spite Stone both scale up as your health falls, and Mirage means the risk you are taking on is mostly theoretical.
- ▸Summon your Stray Doubles before you commit to anything. They are both your damage multiplier and your two get-out-of-death cards, so entering a fight without them up is the only real way to die in this build.
- ▸Lead with the Naylshotte sidearm ability. Fusillade turns it into a flurry above 80 Resolve, Viletongue puts Bloodcurse on every shot in it, and Blackblood makes each one explode for splash.
- ▸Close with the running light attack. It is a horizontal slash into an overhead slam that hits hard and refills a large chunk of the Resolve bar in a single input.
- ▸Let the first Mirage trigger happen on purpose against a group. The knockdown it causes opens the whole pack up rather than just the one enemy who swung.
- ▸Keep the Clockwork Scythe's light attack as your default in crowds. It is a full 360 spin, so it lands on everything around you and your doubles copy the same sweep.
- ▸Flick Scholar's Wormstone on immediately before you swing, not before you approach. It drains Resolve the entire time it is active whether or not you are attacking.
- ▸Use the Wormstone spin to jump Warp from zero to the 30 stack cap in one swing, then switch it off and keep the attack speed. The Thief's Stone grants Warp per strike and the chainsaw's extra hits stack it almost instantly.
- ▸Resummon the moment a double expires. Alteration at three points gives you eight seconds of uptime, and the gap between expiry and resummon is the only window where a fatal blow is actually fatal.
- ▸Stay aggressive at low health instead of backing off. Mirage triggers on the enemy's next attempt to kill you, so retreating just delays the knockdown you were going to get for free.
- ▸Reach for Mether's Pulse only against damage over time. Burn, poison and lightning are the three things your doubles cannot intercept for you.
- ▸Run the Weltcap in the Passive slot for the slow background refill. It quietly tops you up between fights and blunts a poison or burn tick without spending a healing charge.
- ▸Watch your Resolve as carefully as your health. Resolve is what summons doubles, and a build with no Resolve is a build with no second life bar.
- ▸Treat Catalyst as a Resolve discount rather than a damage talent. Two points cut summon cost by 25% and the third adds 20% to how long the doubles last.
- ▸Treat Instigation as optional. One leftover point is what the creator suggests, and it only starts paying into this build at its third point, where Stray Double melee attacks begin applying Weak stacks.
- ▸Push the Arbiter's Prize and Viletongue Hedron to their top levels before other upgrades. Both go permanent there and stop charging you Resolve to maintain an infusion.
- ▸Equip the Grisha Remnant in the Passive slot when you want more bodies on the field. Its passive gives melee hits a chance to summon a free Grisha ally, and the chance scales with how many Remnants you have found.
Sources
Verified: 2026-09-14 · All content is original with full credit to original creators.