Ranged Tank Lazlo
 Lazlo
LazloLazlo's Heat Meter is normally a timer you fight against, since it drains on its own and takes his armor with it when it overheats. One point in Inflamed stops the drain entirely, which parks the meter at full and makes its bonuses permanent instead of temporary. That turns a burst mechanic into a flat 30% damage buff and 20% damage reduction that never expires. Melee exists only to refill Resolve, which is then spent on an 80-Resolve shotgun flurry at 50% critical chance to detonate Bloodcurse.
Damage
50% crit chance on an 80-Resolve flurry, each crit stacking Bloodcurse
Survivability
20% damage reduction at full heat, 50% chance to survive a fatal blow
Boss
Out-trades packs. Three large spiders at once did almost no damage

Lazlo
Lazlo the Justiciar is the armored shell and carries the largest health pool in the game. His Retribution ability superheats his plate to release a shockwave, and repeated use fills a Heat Meter that eventually overheats into a much larger blast at the cost of shedding his armor for a few seconds. His Fortified Plate passive gives him a flat 10% damage reduction for as long as that armor is on.

Not the damage source. This is the Resolve battery that pays for everything the sidearm does. Its light attack strings are short and fast, and with the Duality Stone every hit in the combo lands twice, so Resolve comes back at roughly double rate. Stack Warmed Up's 35% bonus Resolve from melee on top and a full 80-Resolve flurry is only a few swings away.
Alternatives
- AxatanaWiki
How to Obtain
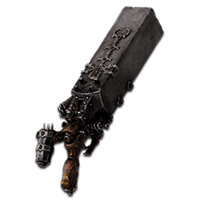
Where all the damage actually happens. It fires an explosive blast rather than a single projectile, so every crit roll from the Fusillade flurry gets multiple chances to land and apply Bloodcurse. You are handed it in the Prologue and it stays best in slot here, because it accepts every stone this build needs without a single incompatibility.
How to Obtain

Take this over the parry seal. Harden freezes you in place to absorb one incoming attack, and critically it works mid-swing, so you can start a melee string into a telegraphed hit and tank it without dropping the combo. On a shell this tanky the extra riposte damage a parry would give is worth less than never having your Resolve generation interrupted.
How to Obtain

Kept in the active slot for rooms that go wrong. It drops a summon that pulls aggro off you while the Heat Meter and armor come back, which matters because the overheat blast strips your plate for a few seconds. The creator carries two charges into any area he expects to get swarmed in.
How to Obtain

Combat Strategy
- ▸Cast Retribution three times before engaging so the Heat Meter is full when the fight starts.
- ▸Confirm both Bloodcurse infusions are at level 3 so they are permanent and cost nothing to maintain.
- ▸Equip Vatra's Seal rather than the parry seal. Harden works mid-swing, so it protects your Resolve generation.
- ▸Slot Common Moonshine in the passive slot and carry two Grisha Remnant charges for rooms you expect to get swarmed in.
- ▸Swing the Axe and Dagger light combo to bank Resolve. The Duality Stone makes each hit count twice.
- ▸Watch the Resolve bar and fire the Fusillade flurry the moment it passes 80.
- ▸Let Bloodcurse stacks build rather than rushing. The flurry applies them faster than most enemies shed them.
- ▸Use ordinary shotgun shots on trash. They are enough on their own and they trigger the Corroded Stone's damage over time.
- ▸Harden into telegraphed hits instead of backing off. Lazlo's health pool and 20% damage reduction mean trading is usually correct.
- ▸Trigger the overheat blast when enemies have you surrounded, then immediately rebuild the meter.
- ▸Expect a few seconds of real vulnerability after every overheat. Incandescence refunds 35% of the meter when the armor returns.
- ▸Spend 100 Resolve on Magdalena's Memento to get airborne out of a pack or over a long boss attack.
- ▸The Corroded Stone does not apply on the Fusillade flurry, only on normal shots. Fire a few ordinary rounds first to seed the damage over time.
- ▸Swap Magdalena's Memento for the Wounding Stone if you would rather trade the escape for Perforation stacks that raise sidearm damage.
- ▸Spare points belong in Rush, where levels 3 and 4 give flat critical hit chance.
- ▸Inner Fire and Rekindle are skipped entirely in this setup. Neither does anything for a build that keeps the meter pinned at full.
Sources
Verified: 2026-09-15 · All content is original with full credit to original creators.